Tag: breakfast

Cheddar Egg Bake With Spinach

Cheddar egg bake with spinach cut into squares, one on a small plate in a shallow bowl.

Nutrition Snapshot

  • About 21 grams of protein in one small square, from eggs, cottage cheese, and cheddar.
  • About 285 calories in that same square, most of it from the cheese and the eggs, so a few bites carry a lot.
  • The trade-off: cheese makes this a higher-fat, higher-sodium dish. That is by design for someone eating very little, and the card shows the amounts.

Eggs whisked with cottage cheese and milk, poured over thawed spinach and shredded sharp cheddar, and baked in a square pan until just set. It cuts into six soft squares that keep in the refrigerator for four days and in the freezer for two months. One square reheats in the microwave in about a minute.

The texture is soft and moist all the way through, more like a savory custard than a frittata, and the flavor is mild: cheddar, a little onion, spinach, and pepper. Nothing sharp, nothing spicy.

Why This Egg Bake Is Great When Appetite Is Small

During an illness or a course of treatment, two things happen at once. The body needs more protein than usual to repair tissue and fight infection, and appetite falls, sometimes to a few bites a meal. A plate of plain food cannot close that gap, because the person cannot eat enough of it.

The answer is to put more nutrition into every bite. Eggs, cheese, cottage cheese, whole milk, nut butter, and olive oil all raise protein and calories without raising the amount of food on the fork. A square of this egg bake a little larger than a deck of cards carries about 21 grams of protein, roughly what a person would get from a full plate of eggs and toast.

Every Ingredient Is Doing Two Jobs

The eggs are the base and about half the protein. The cottage cheese is stirred into the eggs, where it disappears, and adds protein while keeping the texture soft. The cheddar adds protein, calories, and most of the flavor. Whole milk instead of water does the same on a smaller scale.

The spinach is there for iron, folate, and color, and because a small amount of vegetable is easier to eat when it is baked into something soft. How to fortify other everyday foods the same way, and how much protein a day of illness calls for, is in Protein Density: Eating Enough When Appetite Is Small.

Make It on a Good Day

Fatigue is as much a barrier to eating as appetite. This is a recipe for a good day, or for a friend to make: fifteen minutes of work, then the oven does the rest. Cut it into squares while it is warm, cool it, and store the squares in a single layer.

On a hard day, one square goes from the refrigerator to the microwave to the plate in about a minute, with no cooking smell to face. Frozen squares reheat in about two minutes.

Soft, Mild, and Not Too Hot

For a sore mouth or a changed sense of taste, serve the square warm rather than hot, and skip the black pepper. A spoon of plain yogurt or sour cream on top adds moisture and a little more protein. For a metallic taste, the sharpness of the cheddar helps; use extra-sharp.

Cheddar egg bake with spinach cut into squares, one on a small plate in a shallow bowl.
Print Recipe
No ratings yet

Cheddar Egg Bake With Spinach

Eggs, cottage cheese, sharp cheddar, and frozen spinach baked into soft squares that reheat in a minute. About 21 grams of protein in one square.
Prep Time15 minutes
Cook Time35 minutes
Total Time50 minutes
Course: Breakfast, lunch
Cuisine: American
Keyword: cheddar egg casserole, egg bake, high protein breakfast, make ahead breakfast, soft food
Servings: 6 square
Calories: 285kcal

Equipment

  • 8-inch square baking dish
  • Whisk

Ingredients

  • 8 large eggs
  • 1 cup 2 percent cottage cheese
  • 1/2 cup whole milk
  • 1 package (10 ounces) frozen chopped spinach thawed and squeezed dry
  • 1 1/2 cups shredded sharp cheddar cheese (6 ounces)
  • 1/4 cup finely chopped onion
  • 1 tablespoon butter for the dish
  • 1/4 teaspoon salt
  • black pepper to taste

Instructions

  • Heat the oven to 350 degrees F. Butter an 8-inch square baking dish.
  • Squeeze the thawed spinach in your hands or in a clean towel until no more water comes out. Spread it over the bottom of the dish with the chopped onion and 1 cup of the cheddar.
  • In a bowl, whisk the eggs with the cottage cheese, milk, salt, and pepper until blended; small curds of cottage cheese are fine.
  • Pour the eggs over the spinach and cheese. Scatter the remaining 1/2 cup cheddar on top.
  • Bake 30 to 35 minutes, until the center is set and no longer jiggles and the top is lightly golden. Cool 10 minutes before cutting into 6 pieces.
  • Refrigerate up to 4 days or freeze up to 2 months. Reheat one square in the microwave for about 1 minute from the refrigerator, or 2 minutes from frozen.

Notes

For more calories in the same square, whisk 2 tablespoons of olive oil into the eggs or use 4 percent cottage cheese. For a sore mouth, leave out the pepper and serve warm rather than hot. Lower-sodium version: use no-salt-added cottage cheese and skip the added salt. Frozen broccoli, thawed and chopped small, can replace the spinach.

Nutrition

Calories: 285kcal | Carbohydrates: 6.6g | Protein: 21g | Fat: 20g | Saturated Fat: 9.6g | Sodium: 552mg | Potassium: 309mg | Fiber: 1.5g | Sugar: 3.4g | Calcium: 362mg | Iron: 2mg | Magnesium: 52mg | Phosphorus: 355mg | Choline: 220mg

Gluten Free

Eggs, cheese, cottage cheese, milk, and spinach are naturally free of gluten, and this recipe uses no flour or bread. For people with celiac disease, check the shredded cheddar label, since a few brands dust shredded cheese with wheat starch to keep it from clumping; a block of cheddar shredded at home avoids the question. People who avoid gluten by preference can use any shredded cheese.

Go deeper


Cinnamon Avocado Quick Bread for a Tender, Butter-Free Loaf

Nutrition Snapshot

  • Mashed avocado supplies the fat instead of butter, so most of the fat in a slice is monounsaturated.
  • Whole wheat flour and mashed avocado both add fiber, so a slice gives you more than a white flour loaf.
  • This is still a sweet bread with real brown sugar, so use the allulose swap in the notes.

An overripe avocado, too soft to slice, mashes straight into quick bread batter in place of the butter. Avocado is about three quarters water, so the loaf bakes tender and stays soft. The flavor under the cinnamon and brown sugar is mild and a little buttery. Most people taste the spice first.

Avocado Changes the Kind of Fat in Every Slice

About two thirds of the fat in butter is saturated. About two thirds of the fat in an avocado is monounsaturated, the same kind that makes up most of the fat in olive oil.

Saturated fat raises LDL cholesterol, and LDL particles carry that cholesterol into the artery wall. Monounsaturated fat eaten in its place lowers LDL cholesterol. Eating avocado instead of foods like butter, cheese, or processed meat is linked to a lower rate of cardiovascular disease (Pacheco et al., J Am Heart Assoc, 2022, PMID 35352568). Baking with mashed avocado in place of butter makes that same swap.

What’s in a Serving

A slice gives you fiber from two places. The whole wheat flour is one, and the avocado is the other, since avocado has more fiber than sugar. Most of the fat comes from the avocado, so most of the fat in a slice is monounsaturated. The eggs and milk bring a little saturated fat along with a little protein.

Real brown sugar is in here too, and it is the reason a slice tastes like dessert. The recipe card below shows the exact figures for a serving.

What To Buy

A Very Ripe Avocado Mashes Smooth

The avocado has to mash completely smooth or you will find green lumps in the finished loaf. Press the skin near the stem end and it should give easily under your thumb. An avocado one day past the point where you would slice it is right for this.

Two medium avocados give you about a cup of mashed avocado. The recipe needs three quarters of a cup, so eat the rest on toast.

The crumb can look faintly green when you cut into it. That is normal, and the cinnamon and brown sugar cover most of it.

Buy Organic Flour

Buy organic whole wheat and organic all purpose flour (to avoid glyphosate), since wheat is one of the crops often sprayed to dry the field before harvest, and organic growing does not allow it.

Half whole wheat and half all purpose keeps the fiber up while the crumb stays light. All whole wheat works too, and the loaf comes out denser and nuttier.

Brown Sugar Suits a Mild Avocado

Brown sugar has molasses in it, and the molasses gives the loaf a caramel flavor. Avocado tastes mild, so that flavor is most of what you notice. Light and dark both work, and dark gives you a deeper color and a stronger flavor. Pack it into the measuring cup.

Who This Fits and Who Should Watch the Portion

This loaf fits someone cutting back on saturated fat, watching LDL cholesterol, or looking for a baked good with fiber in it. It also travels well in a lunchbox and stays moist when wrapped.

Watch the portion if you are counting carbohydrate at breakfast. A slice of this loaf carries about as much carbohydrate as a slice and a half of sandwich bread, and the brown sugar is part of that. One slice with a boiled egg or a cup of plain yogurt makes a steadier breakfast, because the protein alongside it slows the rise in blood sugar.

How To Make It Your Own

Cocoa turns this into a different bread entirely. Replace a quarter cup of the flour with unsweetened cocoa powder and the crumb goes dark, which hides the green tint completely. For a brighter loaf, add the zest of one lime and leave out the cinnamon.

A half cup of chopped walnuts folded in at the end adds crunch and a little more unsaturated fat.

Swaps Recap

  • Low sodium: cut the salt to a quarter teaspoon. Keep the full teaspoon of baking soda, since that is what makes the loaf rise.
  • Lower sugar: use allulose in place of the brown sugar, since it measures close to sugar and browns much like it. Allulose is a little less sweet than sugar, so the loaf comes out milder and the top colors sooner. A monk fruit blend works too, and you follow the package to match the sweetness of half a cup of sugar.
  • Dairy free: use any unsweetened plant milk in place of the milk. The milk is the only dairy in the loaf.
  • Nut free: make the base loaf and skip the walnut variation.

Storage, Make-Ahead, and Freezing

Cool the loaf completely before you wrap it, or steam will make the top gummy. Wrapped airtight at room temperature it keeps two days. In the refrigerator it keeps five, and a slice tastes better warmed for ten seconds in the microwave.

This loaf freezes well. Slice it first, stack the slices with parchment between them, and freeze the stack in a bag for up to three months. A frozen slice toasts straight from the freezer, so one Sunday bake covers weekday breakfasts.

Print Recipe
No ratings yet

Cinnamon Avocado Quick Bread for a Tender, Butter-Free Loaf

A tender cinnamon quick bread where mashed avocado takes the place of the butter. It uses up an overripe avocado and freezes well.
Prep Time15 minutes
Cook Time50 minutes
Total Time1 hour 5 minutes
Course: Breakfast
Keyword: avocado bread, avocado quick bread, butter free quick bread, heart healthy baking
Servings: 12 servings
Calories:

Equipment

  • Loaf Pan
  • Mixing bowl
  • Whisk
  • Spatula
  • Wire Rack

Ingredients

  • 3/4 cup avocado mashed, ripe, about 1 1/2 medium
  • 1/2 cup brown sugar packed
  • 2 eggs large
  • 1/3 cup milk
  • 1 teaspoon vanilla extract
  • 3/4 cup whole wheat flour organic
  • 3/4 cup all purpose flour organic
  • 1 teaspoon baking soda
  • 1 1/2 teaspoons cinnamon ground
  • 1/2 teaspoon salt

Instructions

  • Heat the oven to 350 degrees F.
  • Grease a 9×5 inch loaf pan.
  • Mash the avocado in a large bowl until it is completely smooth, with no lumps left.
  • Whisk the brown sugar, eggs, milk, and vanilla into the mashed avocado until the mixture looks even.
  • Stir the whole wheat flour, all purpose flour, baking soda, cinnamon, and salt together in a second bowl.
  • Fold the dry ingredients into the wet ingredients until they are just combined.
  • Scrape the batter into the loaf pan.
  • Level the top with a spatula.
  • Bake 45 to 50 minutes, until a toothpick in the center comes out clean.
  • Cool the loaf in the pan for 10 minutes.
  • Turn the loaf out onto a wire rack to cool completely.

Notes

Look for organic whole wheat flour and organic all purpose flour. Wheat is often treated with glyphosate before harvest, and organic flour is grown without it.
The avocado has to mash completely smooth or you will find green lumps in the finished loaf. An avocado one day past the point where you would slice it is right for this. Two medium avocados give you about a cup of mashed avocado, so you will have a little left over.
Lower sugar: use allulose in place of the brown sugar. It measures close to sugar and browns much like it. Allulose is a little less sweet than sugar, so the loaf comes out milder and the top colors sooner. A monk fruit blend works too; follow the package to match the sweetness of half a cup of sugar.
Low sodium: cut the salt to 1/4 teaspoon. Keep the full teaspoon of baking soda, since that is what makes the loaf rise.
Dairy free: use any unsweetened plant milk in place of the milk.
Nut free: make the base loaf and skip the walnut variation.
Cocoa variation: replace 1/4 cup of the flour with unsweetened cocoa powder. The dark crumb hides the faint green tint completely.
Walnut variation: fold 1/2 cup chopped walnuts in at the end.
Lime variation: add the zest of one lime and leave out the cinnamon.
The crumb can look faintly green where you cut it. That is normal, and the cinnamon and brown sugar cover most of it.
Cooling is passive and adds about 1 hour on top of the 65 minutes of prep and bake time.
Storage: cool completely, then wrap airtight. It keeps 2 days at room temperature and 5 days in the refrigerator. To freeze, slice first, stack the slices with parchment between them, and freeze up to 3 months. A frozen slice toasts straight from the freezer.

Avocado Gives This Loaf a Tender Crumb and Mostly Monounsaturated Fat

Using mashed avocado in place of butter makes most of the fat in a slice monounsaturated. The whole wheat flour adds fiber on top of that. The brown sugar is still real sugar, and a slice is sweet enough to count as dessert. Keep it to one slice, put something with protein next to it, and you have a breakfast.

Serve It With

A cup of plain Greek yogurt turns a slice into a breakfast that holds you until lunch. Two eggs work the same way, and a warm slice next to a Chickpea and Spinach Egg Scramble makes a full weekend plate. For dessert, serve it warm alongside Baked Cinnamon Apples. To read more about why the fiber in here matters, see Fiber 101: Gut Health, Weight Management, Cholesterol, and More.


Basil Spaghetti Frittata for a Blood-Sugar-Friendly Breakfast

Nutrition Snapshot

  • Whole wheat pasta and egg protein digest slowly together, so this frittata fits a blood-sugar-friendly eating pattern.
  • A wedge carries 20 grams of protein, from the eggs and whites, the cheese and milk, and the pasta itself.
  • Sodium sits near 490 milligrams a wedge once the dish is seasoned, so use the lighter salt option if you are watching it.

Cook a little extra pasta at dinner and breakfast is most of the way done. Two and a half cups of cooked whole wheat spaghetti go into a skillet with eggs, basil, and green onion, and about twenty minutes later you have four wedges. Eat one warm at breakfast, or pack one cold for lunch with a salad.

Whole Grains and Egg Protein Together Slow the Rise in Blood Sugar

The Pasta Itself Digests Slowly

Pasta behaves differently from most starchy foods. The dough is dense, and the protein network in it traps the starch granules, so the starch breaks down more gradually than the starch in bread does. Whole wheat spaghetti adds to that, since it keeps the bran and germ that white pasta loses. The portion size is what drives most of the blood sugar response to a pasta meal.

Cooled Pasta Changes Again

This recipe is built on pasta cooked the night before, and the chilling does something useful. Some of the starch recrystallizes as it cools into resistant starch, which passes through the small intestine largely undigested and feeds the bacteria in the colon instead. It behaves more like fiber than like starch. Reheating in the skillet keeps part of that change.

Protein Slows the Stomach

A wedge carries 20 grams of protein, from the eggs and egg whites, the mozzarella and milk, and the spaghetti itself. Protein and fat in the same meal slow how quickly the stomach empties. The carbohydrate then reaches the bloodstream more gradually, and blood sugar rises more gently than it would after a bowl of pasta alone.

What the Yolks Add

The eggs bring more than protein. The yolks supply choline, which the body uses to build cell membranes and the signaling molecule acetylcholine, along with vitamin D and the eye pigments lutein and zeaxanthin. The two extra whites raise the protein with almost no added fat.

What’s in a Serving

A serving is one wedge, a quarter of the skillet. Most of the carbohydrate comes from the spaghetti, about 26 grams of it, and the whole wheat version brings fiber along with it. Protein comes to 20 grams, and it arrives from four places: the eggs and whites, the mozzarella, the milk, and the pasta.

Sodium comes to about 490 milligrams a wedge. Roughly 280 of that is the half teaspoon of salt, and the rest arrives with the eggs and the mozzarella in about equal shares. A quarter teaspoon of salt instead brings the wedge down near 350. Calcium comes to about 178 milligrams, and the fat is moderate.

What to Buy

The Whole Wheat Spaghetti

Look for whole wheat or whole grain as the first word on the ingredient line rather than enriched or multigrain, which can still be mostly refined flour. Buy organic (to avoid glyphosate), since wheat is one of the crops often sprayed to dry the field before harvest, and organic growing does not allow it. Leftover spaghetti chilled overnight is the best version to use here.

The Eggs and Egg Whites

Large eggs are the size the recipe card is built on. If you keep a carton of liquid egg whites in the refrigerator, two tablespoons stand in for each white and save you separating eggs.

Salt and Lemon

Eggs and pasta both need salt to taste like anything, and this recipe carries half a teaspoon across four wedges. Add it in two places, a quarter teaspoon over the pasta in the pan and a quarter teaspoon whisked into the eggs. The seasoning then reaches the whole skillet instead of sitting on top.

Kosher salt measures differently. Use a teaspoon of Diamond Crystal, or a scant three quarters of a teaspoon of Morton, in place of the half teaspoon of table salt.

A squeeze of lemon at the table is what keeps a seasoned egg dish tasting balanced. Acid sharpens the flavors the salt brings forward, and it lets you use less salt than you otherwise would. Two tablespoons of grated Parmesan whisked into the eggs does similar work.

The Mozzarella, Basil, and Green Onion

Two ounces of shredded mozzarella melt into the top and add a mild, milky flavor. A low-moisture block you shred yourself melts more evenly than pre-shredded cheese, which is dusted with starch. Fresh basil matters here. Dried basil tastes flat, and the fresh leaf is what gives the dish its flavor. Stir most of it in and scatter the rest over the wedges after cooking so it stays green.

Who This Fits

Who It Fits

This frittata suits anyone eating for steadier blood sugar, since the dense pasta, the fiber, and the protein all slow how fast the carbohydrate reaches the blood. For a vegetarian, one wedge supplies 20 grams of protein at breakfast, which takes some doing at that hour.

Fitting It Into a Carbohydrate Target

A wedge carries about 26 grams of carbohydrate, so place it in your day before you add bread or fruit alongside. Two wedges double that figure. Adding vegetables is the change that improves the wedge most, and two handfuls of spinach or a diced bell pepper go into the skillet with the pasta in about a minute.

How to Make It Your Own

Vegetables are the easiest upgrade. Wilt two handfuls of baby spinach into the pasta, or fold in chopped bell pepper, sliced mushrooms, or halved cherry tomatoes. More vegetables mean more fiber and a more filling wedge for about the same calories.

To lower the carbohydrate, cut the spaghetti to one and a half cups and whisk in an extra egg. A lentil or chickpea pasta raises the protein and the fiber at the same time, and it makes the dish gluten-free. For a dairy-free version, use unsweetened soy or pea milk, which keep some protein, and leave the cheese out.

The Health Swaps in Short

  • Lower sodium: use a quarter teaspoon of salt in place of the half, and lean harder on the lemon, the black pepper, and the basil.
  • Lower sugar: none needed here. The recipe contains no added sugar.
  • Dairy-free: use unsweetened soy or pea milk and leave out the mozzarella, or use a dairy-free shred that melts.
  • Gluten-free: use a lentil, chickpea, or brown rice spaghetti in place of the whole wheat.
  • Nut-free: the recipe is already nut-free.

Cook It Once and Eat It for Four Days

A frittata keeps well, which makes it a strong make-ahead breakfast. Let it cool, then store the wedges in a covered container in the refrigerator for up to four days. Reheat a wedge in a covered skillet over low heat, or in the microwave in short bursts, so the eggs stay tender.

Cold wedges are good straight from the container, which makes this an easy packed lunch. You can also cook the spaghetti a day ahead and keep it refrigerated. Cold noodles clump, so run warm water over them and toss them apart before they go into the pan.

Print Recipe
No ratings yet

Basil Spaghetti Frittata

Cooked whole wheat spaghetti set into a basil and green onion frittata, seasoned and finished with lemon. One skillet, four wedges, and 17 grams of protein in each one.
Prep Time10 minutes
Cook Time10 minutes
Total Time20 minutes
Course: Breakfast
Keyword: basil frittata, blood sugar friendly breakfast, high protein vegetarian, make ahead breakfast, whole wheat pasta frittata
Servings: 4 servings
Calories: 368kcal

Equipment

  • Medium Nonstick Skillet
  • Skillet Lid
  • Mixing bowl
  • Whisk

Ingredients

  • 1/3 cup green onions chopped
  • 2 tablespoons basil chopped, fresh
  • 2 1/2 cups whole wheat spaghetti cooked
  • 1/3 cup milk 1% low fat
  • 4 eggs large
  • 2 egg whites large
  • 1/2 teaspoon salt divided
  • 1/2 teaspoon black pepper ground
  • 2 ounces mozzarella cheese shredded, low-moisture
  • 2 teaspoons olive oil
  • 1/2 lemon cut into wedges, for serving

Instructions

  • Chop the green onion.
  • Chop the basil and set a little aside for the top.
  • Coat a medium nonstick skillet with the olive oil.
  • Spread the cooked spaghetti evenly across the skillet.
  • Sprinkle 1/4 teaspoon of the salt over the spaghetti.
  • Cook the spaghetti over medium heat for 2 minutes.
  • Whisk the milk, eggs, egg whites, the remaining 1/4 teaspoon salt, and the black pepper together in a bowl.
  • Pour the egg mixture gently over the pasta.
  • Sprinkle the mozzarella over the top.
  • Scatter the green onion and most of the basil over the cheese.
  • Cover the skillet and cook over medium heat for about 8 minutes, until the center is set.
  • Cut the frittata into 4 wedges.
  • Scatter the reserved basil over the wedges.
  • Serve with lemon wedges.

Notes

Serving size: 1 wedge. The recipe makes 4.
The spaghetti is cooked before it goes into this recipe, so the prep and cook times here cover the frittata only. Leftover spaghetti cooked the day before and chilled overnight is the best version to use. Cold noodles clump, so run warm water over them and toss them apart before they go into the pan.
Look for organic whole wheat spaghetti. Wheat is often treated with glyphosate before harvest to dry the field, and organic wheat is grown without it.
Add vegetables: wilt two handfuls of baby spinach into the pasta, or fold in chopped bell pepper, sliced mushrooms, or halved cherry tomatoes. The recipe holds no vegetables as written.
Lower carbohydrate: cut the spaghetti to 1 1/2 cups and whisk in an extra egg. A lentil or chickpea pasta raises the protein and the fiber at the same time.
Gluten-free: use a lentil, chickpea, or brown rice spaghetti in place of the whole wheat.
Dairy-free: use unsweetened soy or pea milk and leave out the mozzarella, or use a dairy-free shred that melts.
Salt: the 1/2 teaspoon goes in two places, a quarter teaspoon over the pasta in the pan and a quarter teaspoon whisked into the eggs, so the seasoning reaches the whole skillet instead of the top. Kosher salt measures differently: use 1 teaspoon Diamond Crystal or a scant 3/4 teaspoon Morton in place of 1/2 teaspoon table salt.
Lower sodium: use 1/4 teaspoon salt in place of the 1/2 teaspoon, and lean harder on the lemon, the black pepper, and the basil. That takes roughly 140 milligrams off each wedge.
More savory depth without more salt: a squeeze of lemon at the table, or 2 tablespoons of grated Parmesan folded into the egg mixture.
Nut-free as written. There is no added sugar in the recipe.
Cheese: a low-moisture mozzarella block you shred yourself melts more evenly than pre-shredded cheese, which is dusted with starch.
Make ahead and storage: cool the frittata, then keep the wedges in a covered container in the refrigerator for up to 4 days. Reheat in a covered skillet over low heat, or in the microwave in short bursts, so the eggs stay tender. The wedges are also good cold.
Nutrition is calculated by WP Recipe Maker. Re-run the calculation after import.

Nutrition

Calories: 368kcal | Carbohydrates: 51g | Protein: 20g | Fat: 11g | Saturated Fat: 4g | Sodium: 481mg | Potassium: 309mg | Fiber: 1g | Sugar: 2g | Calcium: 160mg | Iron: 3mg | Magnesium: 105mg | Phosphorus: 328mg | Choline: 137mg

Whole Wheat Pasta and Eggs Together Make a Gentler Breakfast

A wedge of this frittata carries whole grain carbohydrate and 20 grams of protein, and the two together raise blood sugar more gradually than a bowl of pasta on its own. Fiber stops at about 3 grams, so the wedge improves with vegetables folded in.

Sodium lands near 490 milligrams once the dish is seasoned, and the quarter teaspoon version takes about 140 milligrams off that. One wedge is the portion every figure above describes.

Serve It With

A wedge alongside a green salad and a piece of fruit makes a balanced plate at any hour. A bowl of berries suits breakfast, and a cup of tomato soup suits lunch.

For another make-ahead egg dish that tastes good cold, see Chickpea and Spinach Egg Scramble. Cool Summer Squash Soup keeps lunch light, and Easy Cilantro Lime Coleslaw for a Low-Sodium, Heart-Healthy Side adds crunch.


Arepas

Nutrition Snapshot

  • Arepas are made from corn, so they are naturally gluten free and fit a gluten-free eating pattern.
  • The cheese is worked into the dough, so an arepa gives you protein and calcium along with the starch.
  • An arepa is a starchy bread, so keep the portion to one and fill it with protein.

An arepa is a corn cake, and this one has the cheese mixed right into the dough. Five ingredients, one bowl, and a ten-minute rest before you shape them. What comes off the griddle is a soft round with a thin crust, sturdy enough to split and fill. For anyone avoiding wheat, it is a bread you can make on a weeknight without a special flour blend.

Corn Holds Arepas Together Without Gluten

Wheat breads hold their shape because gluten forms an elastic web that traps gas. Corn has no gluten, so an arepa gets its structure another way. Masarepa is corn that has been cooked and then dried, so its starch has already swollen and set once. Add warm water and it swells again within minutes. That swollen starch binds the dough.

During the ten-minute rest, the starch finishes taking up the water. A short knead afterward pulls everything together, and the loose paste turns into something you can pat into a round. Shape it too early and the edges crack. If the dough still feels wet after the rest, work in another spoonful of masarepa.

The Cheese in the Dough Supplies the Protein

Four ounces of cheese spread across four arepas puts protein, fat, and calcium into every bite of the bread itself. Grate or crumble it fine and it disappears into the dough, so the protein and the salt are spread evenly through the round.

Protein and fat also slow how fast the stomach empties, so the glucose from the corn starch reaches the bloodstream more gradually. The effect is modest. An arepa is still a starchy bread, so the portion is one, and what you put inside it changes the whole meal.

What’s in a Serving

Most of the carbohydrate comes from the masarepa, and so does the small amount of fiber. The cheese brings the protein, the calcium, and nearly all of the sodium. The butter on the griddle adds a little fat. The anise seed adds flavor and nothing else. The recipe card below shows the calculated figures for one arepa.

What to Buy

Masarepa Is the Precooked Corn Meal Arepas Need

Arepas need precooked white corn meal, sold as masarepa and labeled harina de maíz precocida. P.A.N. and Goya are the common supermarket brands. Masa harina, the corn flour cooked with lime and used for tortillas, gives a grainy, crumbly arepa. Fine corn flour and cornstarch give no structure at all.

If you are cooking for someone with celiac disease, buy a bag marked certified gluten free. Corn has no gluten of its own, and corn meal is often milled and packed on lines that also handle wheat.

Costeño Cheese and What Stands In For It

Queso costeño is a firm, salty Colombian cheese that holds its shape rather than melting into the dough. Queso fresco and queso blanco are the closest supermarket stand-ins, and both are milder, so the arepa tastes plainer and the sodium drops. They crumble instead of grating, so break them up fine with your fingers. A mild feta gets you closer to the original salt level.

Anise Seed Gives the Arepa a Faint Sweetness

The half teaspoon of anise seed gives a light licorice flavor that is common in Colombian coastal cooking. Crush the seeds between your fingers as they go in so the flavor spreads. Leave the anise out for a plain savory arepa, and the recipe still works.

Medium Heat Gives You a Crust and a Cooked Middle

Heat the pan first, then butter it, then lay the arepas in. Cook them over medium heat for four to five minutes a side. High heat browns the outside before the center sets, and low heat dries the round out before it colors. A finished arepa sounds hollow when you tap it.

A cast iron skillet or a ridged arepa pan both hold steady heat well. A thin nonstick pan heats unevenly, so turn the arepas more often if that is what you have. One teaspoon of butter is enough for all four.

Who This Fits and Who Goes Easy

This is a bread for anyone eating gluten free, whether that is celiac disease, non-celiac gluten intolerance, or digestive symptoms that ease when wheat comes out. Go easy if you are counting carbohydrate closely, since an arepa is a starchy bread and one is a full portion. Go easy on the cheese if you are watching sodium, because that is where nearly all of it comes from.

How to Make It Your Own

Split a cooked arepa most of the way through and fill it. Scrambled eggs, black beans, shredded chicken, avocado, or a slice of ham all work, and a filled arepa turns a bread into a meal. For a firmer round that holds more filling, work an extra spoonful of masarepa into the dough before you shape it.

Lower sodium: use half the cheese, choose a mild queso fresco, and add a little more anise seed for flavor. Dairy free: leave the cheese out, cook the arepas in coconut oil in place of the butter, and expect a plainer round that needs a filling. Nut free as written. The recipe has no added sugar, so no sweetener swap applies.

Storage and Make-Ahead

The dough keeps a day in the refrigerator, covered tightly so it stays moist. Cooked arepas keep three days refrigerated and two months frozen. Cool them on a rack first, then stack them with parchment between the layers.

Reheat in a dry skillet over medium heat for two or three minutes a side, which brings the crust back. A microwave alone leaves them soft and damp. Frozen arepas go straight into the skillet from the freezer, with a lid on for the first few minutes.

Print Recipe
No ratings yet

Arepas

Cheese arepas cooked on the griddle from five ingredients. The cheese goes into the dough, so a naturally gluten-free corn cake gives you protein and calcium along with the starch.
Prep Time15 minutes
Cook Time10 minutes
Total Time25 minutes
Course: and Cereals, Breads, Grains
Cuisine: Colombian
Keyword: arepas, cheese arepas, Colombian breakfast, gluten free bread, masarepa
Servings: 4 servings
Calories: 112kcal

Equipment

  • Box Grater
  • Mixing bowl
  • Cast Iron Skillet
  • Arepa Pan

Ingredients

  • 2/3 cup corn meal white, precooked masarepa such as P.A.N. or Goya
  • 4 ounces costeño cheese grated, or queso fresco or queso blanco, crumbled fine
  • 1/2 teaspoon anise seed lightly crushed
  • 1 cup water warm
  • 1 teaspoon butter for the pan

Instructions

  • Place the corn meal in a mixing bowl.
  • Grate the costeño cheese, or crumble the queso fresco fine with your fingers.
  • Add the cheese to the corn meal.
  • Crush the anise seed between your fingers and add it to the bowl.
  • Stir the dry ingredients together.
  • Pour in the warm water.
  • Mix with a spatula until the dough comes together.
  • Let the dough rest for 10 minutes.
  • Knead the dough for 2 to 3 minutes, until it is smooth.
  • Divide the dough into 4 equal pieces.
  • Pat each piece into a circle about 4 inches wide and 1/2 inch thick.
  • Set a skillet or arepa pan over medium heat.
  • Grease the hot pan with the butter.
  • Lay the arepas in the pan.
  • Cook for 4 to 5 minutes, until the underside is lightly browned.
  • Flip each arepa and cook 4 to 5 minutes more, until the second side browns and the arepa sounds hollow when you tap it.
  • Serve warm.

Notes

Serving size: 1 arepa. The recipe makes 4.
Buy precooked white corn meal, sold as masarepa and labeled harina de maíz precocida. P.A.N. and Goya are the common supermarket brands. Masa harina, the corn flour cooked with lime and used for tortillas, gives a grainy, crumbly arepa, and fine corn flour and cornstarch give no structure at all.
Celiac disease: buy a bag marked certified gluten free. Corn has no gluten of its own, and corn meal is often milled and packed on lines that also handle wheat.
The 10-minute rest is inside the prep time. It lets the starch take up the water, so the dough pats out smoothly instead of cracking at the edges. If the dough still feels wet after the rest, work in another spoonful of masarepa.
Cheese: queso costeño is a firm, salty Colombian cheese that holds its shape as it cooks. Queso fresco and queso blanco are the closest supermarket stand-ins. Both are milder, so the arepa tastes plainer and the sodium drops, and both crumble rather than grating. A mild feta gets you closer to the original salt level.
Anise: crush the seeds between your fingers as they go in so the flavor spreads. Leave the anise out for a plain savory arepa.
Lower sodium: use half the cheese, choose a mild queso fresco, and add a little more anise seed for flavor. Nearly all the sodium in the recipe comes from the cheese.
Dairy free: leave the cheese out and cook the arepas in coconut oil in place of the butter. Expect a plainer round that needs a filling.
Nut free as written. There is no added sugar in the recipe.
Filling: split a cooked arepa most of the way through and fill it with scrambled eggs, black beans, shredded chicken, avocado, or ham. For a firmer round that holds more filling, work an extra spoonful of masarepa into the dough before shaping.
Storage: the dough keeps a day in the refrigerator, covered tightly. Cooked arepas keep 3 days refrigerated and 2 months frozen. Cool them on a rack, then stack with parchment between the layers.
Reheating: use a dry skillet over medium heat for 2 to 3 minutes a side to bring the crust back. A microwave alone leaves them soft and damp. Frozen arepas go into the skillet straight from the freezer, with a lid on for the first few minutes.

Nutrition

Calories: 112kcal | Carbohydrates: 19g | Protein: 3g | Fat: 3g | Saturated Fat: 1g | Sodium: 12mg | Potassium: 89mg | Fiber: 3g | Sugar: 0.4g | Calcium: 5mg | Iron: 1mg | Magnesium: 29mg | Phosphorus: 61mg | Choline: 0.2mg

Corn and Cheese Make a Gluten-Free Bread That Holds Protein

An arepa is corn, cheese, water, a little anise seed, and the butter it cooks in. That short list is the appeal. The cheese in the dough is what adds the protein and calcium, and the corn is what makes it a starchy bread. Keep the portion to one arepa. Split it and fill it with eggs, beans, or chicken, and it becomes a meal.

Serve It With

Split a warm arepa and fill it with Chickpea and Spinach Egg Scramble for a breakfast with protein in the bread and the filling both. Black beans, avocado, and a squeeze of lime turn the same round into lunch. If wheat is what you are avoiding, Non-Celiac Gluten Intolerance: Key Strategies for Food and More covers what else to look at.


Belgian Waffles

Nutrition Snapshot

  • Low in potassium and phosphorus, so this waffle works as a breakfast bread on a renal eating pattern.
  • Also low in sodium, and the waffles freeze flat, so one batch of six covers weekday breakfasts.
  • High in carbohydrate and very low in fiber, so keep it to one waffle and top it with berries.

Breakfast is a hard meal to rebuild when the kidneys are clearing less waste than they used to. Bran cereal, potatoes, and milk-heavy foods are higher in potassium and phosphorus than most renal eating plans allow. That leaves a short list of breakfast breads.

This waffle belongs on that list. It comes out crisp outside and tender inside. It uses ingredients most kitchens already have, and the batter takes about twenty minutes of hands-on work. One batch makes six waffles, and the extras freeze well.

Cake Flour and Sour Cream Keep the Potassium and Phosphorus Low

The Minerals Sit in the Bran and the Germ

Most of a wheat kernel’s potassium and phosphorus is in the bran and the germ, its two outer layers. Cake flour is milled from soft wheat with both layers removed. A cup of cake flour holds roughly a third of the potassium and phosphorus in a cup of whole wheat flour.

That same milling step removes most of the fiber. On a renal eating pattern that trade is usually worth making, and the fiber comes from fruit and vegetables instead.

Phosphorus Matters Before a Lab Result Looks High

Healthy kidneys clear extra phosphorus from the blood and keep the blood level in a narrow range. As kidney function drops, the kidneys clear less of it. The body compensates by raising two hormones, parathyroid hormone and FGF23, so a blood phosphorus result often stays normal for years.

That compensation carries a cost. High parathyroid hormone releases calcium from bone, and a high phosphate load promotes calcium deposits in blood vessel walls. Phosphorus intake matters well before a lab result looks high.

Added Phosphate Is Absorbed Almost Completely

The phosphorus that matters most is the added kind. Phosphate additives in processed cheese, deli meat, and dark cola are absorbed almost completely. The phosphorus bound up in whole grains and beans is absorbed at roughly half that rate. This waffle uses cake flour, a small amount of fresh dairy, and eggs, so it carries no added phosphate at all.

What’s in a Serving

Most of a waffle’s calories come from carbohydrate. That carbohydrate comes from the cake flour plus the granulated and powdered sugar. The eggs, sour cream, and milk supply a moderate amount of protein and most of the calcium. Fat comes mainly from the butter and the sour cream, so it leans saturated.

Fiber is where this waffle is weakest, because refined flour has very little of it. The recipe card below lists the exact figures per waffle.

Ingredient Spotlights

Cake Flour

Cake flour has less protein than all-purpose flour, so it builds less gluten and gives a tender waffle. Buy organic (to avoid glyphosate), since wheat is one of the crops often sprayed to dry the field before harvest, and organic growing does not allow it. To make a cake flour stand-in from all-purpose flour, take out two tablespoons per cup and replace them with two tablespoons of cornstarch.

Sour Cream

Sour cream gives the batter its tang and keeps the inside moist. Three-quarters of a cup spread across six waffles is a small amount of dairy per serving, which is what holds the phosphorus down. Light sour cream works well in this batter. Plain Greek yogurt can stand in for half of it and adds a little protein.

Egg Whites

The beaten whites are what make this waffle light, so this is the step to get right. Beat them to soft peaks first, the point where a lifted beater leaves a peak that curls over. Then add the granulated sugar and beat to stiff peaks, where the peak stands upright on its own.

Fold the whites into the batter with a spatula. Stop while a few white streaks still show, because folding past that point deflates the whites and costs you the lift.

Butter

Melt the butter and let it cool a minute before it goes into the yolks. Hot butter poured straight onto egg yolks can scramble them. Use unsalted butter, which is what keeps the sodium in each waffle low.

Who This Fits and How to Portion It

Who It Fits

This fits anyone building a renal eating pattern, and it fits anyone who wants a lighter waffle than a standard buttermilk recipe. It also works in a household where one person is following a renal eating plan and everyone else is eating whatever they like.

Portion It Against Your Own Renal Targets

Renal eating plans differ by stage of kidney disease, and protein targets on dialysis are higher than they are before dialysis. Check the portion against the protein, potassium, and phosphorus targets your kidney care team gave you.

If You Are Managing Blood Sugar

If you are managing blood sugar, keep it to one waffle. A waffle is high in carbohydrate and low in fiber, so eaten alone it raises blood sugar fast. Two eggs alongside and a handful of berries on top slow that rise and make the meal last longer.

How to Make It Your Own

The batter takes additions well. Fold half a cup of blueberries in with the whites, or whisk half a teaspoon of cinnamon into the flour. For a savory waffle, keep about a teaspoon of the granulated sugar so the whites still hold their peaks. Skip the dusting and stir chopped chives and black pepper into the batter.

Swaps Recap

  • Lower sugar: allulose replaces the granulated sugar cup for cup. It is about 70 percent as sweet as sugar and it browns faster, so check the waffle a minute early. A monk fruit blend works too, so follow the package to match the sweetness of the sugar it replaces. Finish with powdered allulose, or skip the dusting and use berries.
  • Lower sodium: the recipe is already low. The small amount present comes from the leavening and the dairy.
  • Lower saturated fat: use light sour cream, or replace half the sour cream with plain Greek yogurt.
  • Dairy free: use coconut oil in place of the butter and an unsweetened plant milk in place of the low fat milk. A plain unsweetened coconut or almond yogurt stands in for the sour cream.
  • Gluten free: a 1:1 gluten free baking blend replaces the cake flour. The waffle comes out more fragile, so give it a full extra minute before you lift the lid.
  • Nut free: the recipe is nut free as written.

Storage, Make-Ahead, and Serving

Cool the waffles in a single layer on a wire rack so the steam escapes and the shell stays crisp. Stacking them straight off the iron traps the steam and softens them. Use the batter the same day you make it, because whipped whites deflate as they sit.

They keep three days in the refrigerator and three months in the freezer. Freeze them flat with a square of parchment between each one, then pull out as many as you want. Reheat in a toaster, or in the oven at 350 degrees F for about five minutes. A microwave leaves them limp.

Print Recipe
No ratings yet

Belgian Waffles

Course: Breakfast, Brunch
Servings: 6
Calories: 367kcal

Ingredients

  • 2 large eggs
  • 2 cups cake flour
  • 3/4 tsp baking soda
  • 3/4 cup sour cream
  • 3/4 cup 1% low fat milk
  • 2 tsp  vanilla extract
  • 4 tbsp unsalted butter
  • 2 tbsp granulated sugar
  • 6 tbsp powdered sugar

Instructions

  • Heat a waffle iron. In a mixing bowl, mix together the cake flour and baking soda and set aside. Separate the egg whites and egg yolks. Whisk together egg yolks, sour cream, milk and vanilla extract. Melt the butter and then mix into the sour cream mixture.
  • In a different bowl, beat the egg whites with a hand-mixer on medium speed until soft peaks form, about 3 minutes. Add the granulated sugar to the egg whites and continue to beat until stiff peaks form, about 3 to 4 more minutes.
  • Whisk the sour cream mixture into the flour mixture until just combined. Gently fold in the beaten egg whites until mixture is smooth; do not overmix.
  • Add about 1/2 cup of the batter to the waffle iron, close and cook for about 3 minutes. Serve waffles with the powdered sugar. Other suggested toppings include fresh berries, whipped cream, jam or syrup.

Nutrition

Serving: 1waffle | Calories: 367kcal | Carbohydrates: 50g | Protein: 8g | Fat: 15g | Sodium: 204mg | Potassium: 151mg | Fiber: 1g | Calcium: 81mg | Phosphorus: 121mg

Whipped Egg Whites Make a Light Waffle That Fits a Kidney-Friendly Morning

Refined cake flour and a small amount of fresh dairy keep the potassium and phosphorus low, and unsalted butter keeps the sodium low. That is what makes this waffle usable on a renal eating pattern. The beaten whites give it a crisp shell and an open, tender inside.

The trade is a lot of carbohydrate and very little fiber, so treat this as a one-waffle breakfast. Add eggs and a handful of berries and the meal lasts until lunch.

Serve It With

Two eggs or a small omelet alongside turns one waffle into a full breakfast, and the Onion Apple Omelet is an easy match. Blueberries or raspberries on top add fiber and flavor for very little potassium. For the wider picture on eating to protect kidney function, see Cornerstone: Early Kidney Failure. For another side that fits a renal plan in a measured portion, see Harvest Wild Rice.


Onion Apple Omelet

Nutrition Snapshot

  • The fiber in the apple and the protein in the eggs make this a blood-sugar-friendly breakfast.
  • Every bit of the sweetness comes from cooked apple and sweet onion, with no added sugar.
  • Butter, cheddar, and three yolks make this richer than a plain scramble, so go lighter on the butter.

A Gala apple and a sweet onion, softened in butter until the onion turns translucent, sweeten this omelet without any sugar. The eggs set around them in a single ovenproof skillet, and the pan finishes in a hot oven. The whole thing takes about half an hour, and the last ten to twelve minutes are hands off while the omelet bakes.

The Sweetness Here Comes With Fiber Attached

Protein and fat both lengthen how long food stays in the stomach. Three eggs, a little milk, and two tablespoons of cheddar give this breakfast enough of both to matter. The apple’s carbohydrate then leaves the stomach in smaller amounts at a time. The sugar reaches the blood over a longer stretch instead of all at once.

The apple helps for a second reason. Its sugars sit inside intact fruit cell walls, alongside a soluble fiber called pectin, so digestion releases them gradually. Sugar stirred into a bowl of cereal has no cell walls around it, so it digests and absorbs fast.

What’s in a Serving

The protein comes from the eggs, the milk, and the cheddar together. The fiber is almost all from the apple and the onion. Most of the calcium comes from the cheddar and the milk, with some from the eggs. The recipe adds no salt of its own, so the sodium stays low. Most of what is there comes from the eggs, and the cheddar adds the rest.

The butter and the cheddar supply about half the fat and the eggs supply the rest. Buy unsalted butter, since salted butter would add about a quarter again to the sodium. The eggs also give you choline, plus a little vitamin D, which few other breakfast foods contain naturally. The recipe card below has the exact figures.

What to Buy and How to Prep It

The Apple

Jonagold, Gala, and McIntosh all sweeten as they cook and soften into the eggs. A firmer apple such as Honeycrisp or Braeburn holds its shape better if you want distinct slices. The steps have you peel the apple. Leave the skin on instead and you get more fiber and more polyphenols, both of which concentrate in the peel. A thin-skinned Gala softens fine in the pan.

The Onion

A sweet onion, Vidalia or Walla Walla, contains less of the sulfur compounds that taste sharp raw. It cooks down mild in five or six minutes. A yellow onion works and needs a couple of extra minutes. Slice it thin so it softens at the same rate as the apple.

The Eggs and the Cheese

Two tablespoons of shredded cheddar is enough to brown on top and season the whole pan. Sharp cheddar gives you more flavor per tablespoon than mild. Keep the nutmeg even though the amount looks small. An eighth of a teaspoon makes the whole omelet taste sweeter.

Who This Fits and Who Should Go Easy

This suits a blood-sugar-friendly eating pattern: moderate carbohydrate, real fiber, and enough protein and fat to slow how fast you digest the meal. If you count carbohydrate at breakfast, a serving is close to a small bowl of oatmeal.

Go easy on the portion if you are watching saturated fat closely. Between the butter, the cheddar, and three yolks split two ways, this is a richer breakfast than an egg-white scramble. Use a teaspoon of butter instead of a tablespoon, in a small cast-iron or oven-safe nonstick skillet, and the fat comes down.

How to Make It Your Own

For more protein, use two whole eggs plus two whites and add another tablespoon of cheese. For more fiber, leave the apple skin on and wilt a handful of baby spinach into the pan with the onion. A pinch of cinnamon alongside the nutmeg makes it taste sweeter. A pinch of thyme or sage makes it savory. Gruyere or sharp white cheddar both work in place of the cheddar.

The standard swaps for this recipe:

  • Lower sodium: use one tablespoon of cheddar or leave the cheese out. The eggs supply most of what remains.
  • Lower sugar: the recipe has no added sugar, so there is nothing to cut. The sweetness is the apple and the onion.
  • Dairy-free: cook in coconut oil in place of the butter, use an unsweetened plant milk, and leave the cheese out.
  • Nut-free: the recipe is already nut-free as written.

Storing It and Making It Ahead

Cooked eggs keep three to four days covered in the refrigerator. Cut the omelet into wedges, let it cool, and store it in a shallow container so it chills quickly. Reheat a wedge in a covered skillet over low heat for a few minutes, or in the microwave at half power in twenty-second bursts. High heat turns cooked eggs rubbery.

You can also do the slow step the night before. Saute the apple and onion, refrigerate them, and warm the pan again in the morning before the eggs go in. That leaves about five minutes of hands-on work in the morning, plus the bake.

Print Recipe
No ratings yet

Onion Apple Omelet

A skillet omelet with sweet onion and apple cooked into the eggs, then finished in the oven. The apple and onion supply all of the sweetness, so there is no added sugar.
Prep Time10 minutes
Cook Time20 minutes
Total Time30 minutes
Course: Breakfast
Keyword: apple omelet, baked omelet, blood sugar friendly breakfast, onion apple omelet
Servings: 2 servings
Calories: 292kcal

Equipment

  • Ovenproof Skillet
  • Mixing bowl

Ingredients

  • 3 eggs large
  • 1/4 cup milk 1% low fat
  • 1 tablespoon water
  • 1/8 teaspoon black pepper
  • 1/8 teaspoon nutmeg ground
  • 1 tablespoon butter unsalted
  • 3/4 cup sweet onion thinly sliced
  • 1 apple large, peeled, cored, and thinly sliced
  • 2 tablespoons cheddar cheese shredded

Instructions

  • Preheat the oven to 400 degrees F.
  • Peel, core, and thinly slice the apple.
  • Thinly slice the sweet onion.
  • Beat the eggs in a small bowl with the milk, water, black pepper, and nutmeg.
  • Melt the butter in a small ovenproof skillet over medium heat.
  • Saute the onion and apple until the onion is translucent, 5 to 6 minutes.
  • Spread the onion and apple across the skillet in an even layer.
  • Pour the egg mixture evenly over the top.
  • Cook over medium heat until the edges begin to set.
  • Sprinkle the shredded cheddar over the surface.
  • Bake for 10 to 12 minutes, until the center is firmly set.
  • Cut the omelet in half and serve hot.

Notes

Storage: cooked eggs keep three to four days covered in the refrigerator. Cool the wedges and store them in a shallow container. Reheat in a covered skillet over low heat, or in the microwave at half power in twenty-second bursts, since high heat turns cooked eggs rubbery.
Make ahead: saute the apple and onion the night before and refrigerate them. Warm the skillet again in the morning before the eggs go in. That cuts the morning work to about ten minutes.
Apple choice: Jonagold, Gala, and McIntosh all sweeten as they cook and soften into the eggs. A firmer apple such as Honeycrisp or Braeburn holds its shape better. Leaving the skin on adds fiber and polyphenols, and a thin-skinned apple such as Gala softens fine with the skin on.
Lower sodium: use one tablespoon of cheddar or leave the cheese out. The eggs supply most of what remains. Unsalted butter keeps added salt out of the skillet entirely.
Dairy-free: cook in coconut oil in place of the butter, use an unsweetened plant milk, and leave the cheese out.
Higher protein: use two whole eggs plus two whites and add another tablespoon of cheese.
More fiber: leave the apple skin on and wilt a handful of baby spinach into the skillet with the onion.

Nutrition

Calories: 292kcal | Carbohydrates: 20g | Protein: 14g | Fat: 18g | Saturated Fat: 9g | Sodium: 255mg | Potassium: 321mg | Fiber: 3g | Sugar: 14g | Calcium: 201mg | Iron: 1mg | Magnesium: 26mg | Phosphorus: 259mg | Choline: 210mg

Apple and Onion Turn Three Eggs Into a Filling, Blood-Sugar-Friendly Breakfast

An apple and a sweet onion sweeten this omelet with no added sugar, and the eggs supply the protein and fat that slow how fast you digest it. The fat is the tradeoff. Most of it comes from the butter and the cheddar, and you can trim both without losing the dish. Half the skillet is one serving, served hot while the cheese is still soft.

Serve It With

A cup of plain Greek yogurt or a glass of milk alongside raises the protein. A slice of whole-grain toast works when you have room for the carbohydrate. For another egg breakfast built the same way, see Chickpea and Spinach Egg Scramble or Basil Spaghetti Frittata. For the cooked apple at the other end of the day, see Baked Cinnamon Apples for a Warm, Fiber-Rich Dessert.


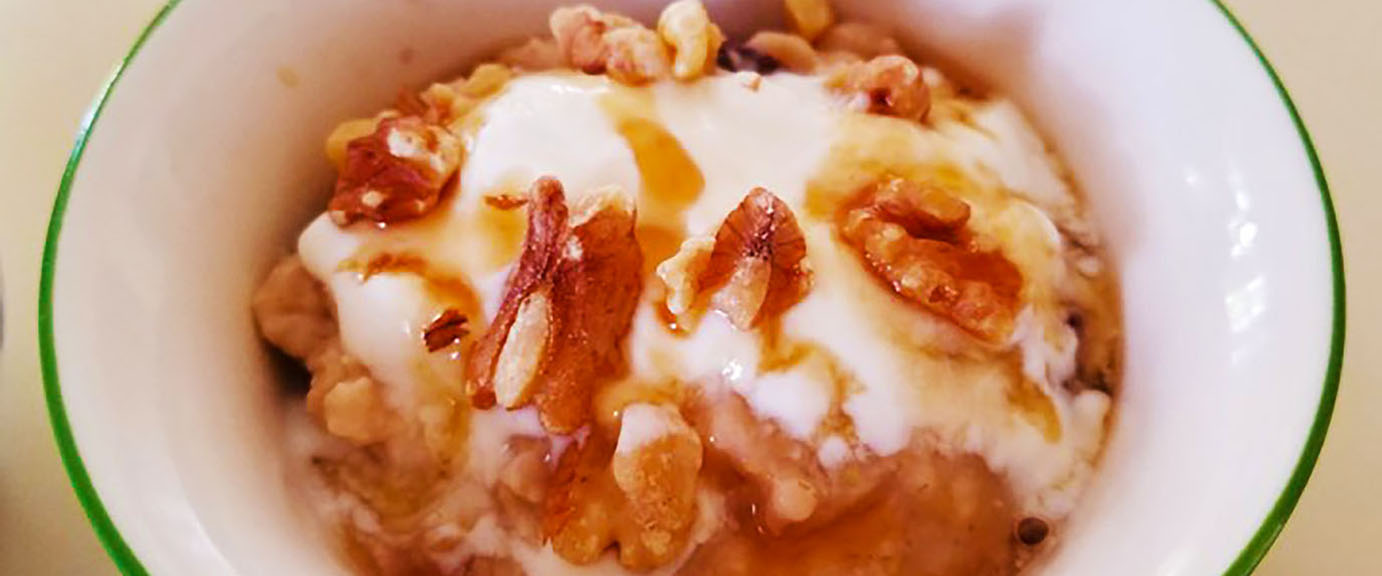
Coconut Oatmeal

Print Recipe
No ratings yet

Coconut Oatmeal

Delicious oatmeal made with coconut, raisins, cranberries, walnuts. Brown rice can be used in place of oatmeal.
Prep Time5 minutes
Cook Time10 minutes
Total Time15 minutes
Course: Breads, Grains, and Cereals, Breakfast, Carbohydrate Foods
Servings: 6
Calories: 379kcal

Ingredients

  • 3 1/2 cups plain or vanilla soy milk
  • 1/4 tsp salt
  • 2 cups  rolled oats
  • 1/4 cup pure maple syrup
  • 1/3 cup raisins
  • 1/3 cup dried cranberries
  • 1/3 cup sweetened flaked coconut
  • 1/3 cup chopped walnuts
  • 1 (8 ounce) container plain yogurt (optional)
  • 3 tbsp honey (optional)

Instructions

  • Pour the milk and salt into a saucepan, and bring to a boil. Stir in the oats, maple syrup, raisins, and cranberries. Return to a boil, then reduce heat to medium. Cook for 5 minutes. Stir in walnuts and coconut, and let stand until it reaches your desired thickness. Spoon into serving bowls, and top with yogurt and honey, if desired.

Nutrition

Calories: 379kcal | Carbohydrates: 63.1g | Protein: 11.6g | Fat: 10.4g | Saturated Fat: 2g | Sodium: 212mg | Potassium: 499mg | Fiber: 5.1g | Calcium: 140mg | Iron: 3mg

Egg and Sausage Burritos

Nutrition Snapshot

  • Protein from eggs and turkey sausage plus a high-fiber tortilla makes this a blood-sugar-friendly breakfast.
  • One Sunday session makes eight burritos, so a hot weekday breakfast takes about two minutes.
  • Sausage, cheese, and tortillas all contain sodium, so use the lower-sodium build in the notes if you watch salt.

Breakfast is the meal most often skipped or bought on the way to work. You are moving, you are late, and scrambling eggs takes a pan and ten minutes. Making eight burritos on a Sunday afternoon solves that. Each one goes into the freezer wrapped in foil, and each one reheats in about two minutes.

Protein and Fiber Together Slow the Rise in Blood Sugar

Where the Glucose Comes From

The tortilla contains nearly all the carbohydrate in this burrito. Wheat starch is a long chain of glucose molecules. Digestive enzymes break that chain apart in the small intestine, and the glucose crosses into the blood. A white flour tortilla digests fast, which is why blood sugar rises quickly after a bread-based breakfast.

What the Eggs and Sausage Do

Protein and fat slow how fast the stomach empties into the small intestine. Eggs and sausage supply both. The starch then reaches the enzymes over a longer period, so glucose enters the blood more gradually and the peak after the meal is lower. Eating the protein and the carbohydrate in the same meal is what produces that effect.

What the Fiber Adds

Fiber is the part of a plant food that human digestive enzymes leave intact. It takes up part of the flour weight and yields no glucose, so a higher-fiber tortilla contains less available starch than a white one the same size. The soluble kind also thickens the contents of the small intestine, which slows how fast glucose crosses into the blood.

Each effect is modest on its own. Both add to what the eggs and sausage are already doing, which is why the whole burrito matters more than any one part of it.

What’s in a Serving

A serving is one burrito. Twelve eggs, a pound of sausage, and a cup of cheese divide eight ways. Each burrito gets an egg and a half, two ounces of raw sausage, and two tablespoons of cheddar. That much protein and fat makes one burrito a substantial breakfast rather than a snack.

The carbohydrate and nearly all the fiber come from the tortilla, so the brand you buy sets both numbers. Fat comes from the yolks, the sausage, and the cheese. Sodium is the figure to watch, since the sausage, the cheese, and the tortilla each add some. The recipe card below has the exact figures.

What to Buy

The Tortillas

Read the fiber line on the package and pick the highest number you like the taste of. Many whole wheat tortillas list 5 grams or more of fiber apiece, and some low-carbohydrate versions list considerably more. Buy organic (to avoid glyphosate), since wheat is one of the crops often sprayed to dry the field before harvest, and organic growing does not allow it.

The Sausage

Bulk turkey breakfast sausage sits beside the pork version in most stores and contains less saturated fat. Read the sodium on the label, since brands differ widely. Chicken sausage cooks the same way in the pan. Pork breakfast sausage tastes richer and works fine here, with more saturated fat and usually more sodium.

The Cheese

Sharp cheddar gives more flavor per tablespoon than mild, so a cup across eight burritos is plenty. Shred it from a block if you have a few minutes. Pre-shredded cheese comes coated in starch to keep the strands separate, and it melts less smoothly.

The Vegetables

Onion and bell pepper add fiber, potassium, and vitamin C, along with flavor and texture. Frozen diced peppers and onions work here and save the knife work. Cook them until the moisture has left the pan, since a wet filling makes a soggy burrito after freezing.

Who This Fits and Who Should Go Easy

Who It Fits

Anyone working on blood sugar gets protein, fat, and fiber in the same breakfast. That combination is what keeps the morning rise gradual. Anyone who skips breakfast for lack of time gets one that takes two minutes. People building muscle get a protein-heavy breakfast without cooking one.

Go Easy If

Go easy if you are holding sodium down. Sausage, cheese, and a tortilla each add salt, and together they add up quickly on a strict low-sodium plan. The swap below brings the total down substantially. Anyone eating very low carbohydrate should choose a low-carbohydrate tortilla or eat the filling in a bowl.

How to Make It Your Own

Black beans are the easiest addition. A cup of drained organic black beans stirred into the filling adds fiber and plant protein, and it gives you enough filling for two more burritos. Five ounces of spinach wilted into the vegetables adds folate and potassium without changing the flavor much.

Salsa is the other easy upgrade. Half a cup stirred into the filling before rolling adds flavor, and a low-sodium jar keeps the salt down. Drain it first so the filling stays dry. For heat, a diced jalapeno goes in with the onion and pepper.

The Health Swaps in Short

  • Lower sodium: choose a low-sodium or no-salt-added sausage, cut the cheese to half a cup, and buy the lowest-sodium tortilla on the shelf.
  • Lower sugar: this recipe is made without added sugar.
  • Dairy-free: leave the cheese out, and add sliced avocado after reheating.
  • Gluten-free: use a corn or cassava tortilla, and expect a smaller wrap with less fiber.
  • Nut-free: the recipe is nut-free as written.

Make the Batch Ahead: They Keep Three Months Frozen

Cool the Filling First

Let the filling cool for ten minutes before you roll. Steam trapped inside the wrap turns the tortilla soft and soggy in the freezer, and ten minutes on the counter is enough to stop it.

Wrapping and Freezing

Wrap each burrito tightly in foil or parchment, then put them all in a labeled freezer bag with the date. They keep four days in the refrigerator and three months in the freezer. A tight wrap keeps air off the surface, and air is what dries a burrito out over a long freeze.

Reheating

To reheat from frozen, unwrap the burrito, roll it in a paper towel, and microwave it for two to three minutes, turning it over halfway. For a crisp outside, finish it in a dry skillet for two minutes a side. An overnight thaw in the refrigerator brings the microwave time down to about ninety seconds.

Print Recipe
No ratings yet

Egg and Sausage Burritos

Make-ahead breakfast burritos with eggs, turkey sausage, peppers, and onion rolled in a high-fiber whole wheat tortilla. Protein, fat, and fiber arrive with the starch, so the morning rise in blood sugar stays gradual.
Prep Time15 minutes
Cook Time20 minutes
Total Time35 minutes
Course: Breakfast
Keyword: blood sugar friendly breakfast, breakfast burritos, freezer breakfast burritos, high protein breakfast, make ahead breakfast
Servings: 8 servings
Calories: 179kcal

Equipment

  • Large skillet
  • Rubber Spatula
  • Slotted Spoon
  • Cutting board
  • Aluminum Foil
  • Freezer Bags

Ingredients

  • 1 tablespoon olive oil
  • 1 pound turkey sausage bulk breakfast style
  • 1 cup onion diced, yellow
  • 1 cup bell pepper diced, red
  • 12 eggs large
  • 1/4 teaspoon black pepper ground
  • 1 cup cheddar cheese shredded, sharp
  • 8 tortillas organic whole wheat, high fiber, 8 inch

Instructions

  • Heat the olive oil in a large skillet over medium heat.
  • Add the sausage to the skillet.
  • Cook the sausage for 6 to 8 minutes, breaking it apart with a spatula, until no pink remains.
  • Move the sausage to a plate with a slotted spoon.
  • Add the onion and bell pepper to the same skillet.
  • Cook the vegetables for about 5 minutes, until they soften and the moisture has left the pan.
  • Crack the eggs into a bowl.
  • Beat the eggs with the black pepper until the yolks and whites are blended.
  • Lower the heat to medium-low.
  • Pour the eggs into the skillet with the vegetables.
  • Stir the eggs slowly with a rubber spatula for about 3 minutes, until they are just set.
  • Remove the skillet from the heat.
  • Return the sausage to the skillet and stir it through the eggs.
  • Let the filling cool for 10 minutes.
  • Warm the tortillas for 20 seconds in the microwave so they roll without cracking.
  • Divide the filling among the 8 tortillas.
  • Top each one with 2 tablespoons of the shredded cheddar.
  • Fold the sides of each tortilla in over the filling.
  • Roll each burrito up from the bottom.
  • Wrap each burrito tightly in foil or parchment.
  • Refrigerate the burritos, or freeze them in a labeled freezer bag.

Notes

Serving size: 1 burrito. The recipe makes 8.
Look for organic tortillas. Wheat is often treated with glyphosate before harvest to dry the field, and organic wheat is grown without it.
Tortillas: read the fiber line on the package and pick the highest number you like the taste of. Many whole wheat tortillas list 5 grams or more of fiber apiece. A low-carbohydrate high-fiber tortilla works well here too.
Sausage: bulk turkey breakfast sausage contains less saturated fat than pork. Chicken sausage cooks the same way in the pan. Pork breakfast sausage tastes richer and works fine, with more saturated fat and usually more sodium. Sodium differs widely between brands, so read the label.
Cheese: sharp cheddar gives more flavor per tablespoon than mild. Shred it from a block if you have a few minutes, since pre-shredded cheese is coated in starch and melts less smoothly.
Cook the vegetables until the moisture has left the pan. A wet filling makes a soggy burrito after freezing.
Lower sodium: choose a low-sodium or no-salt-added sausage, cut the cheese to 1/2 cup, and buy the lowest-sodium tortilla on the shelf. No salt is added in the recipe itself.
Dairy-free: leave the cheese out and add sliced avocado after reheating.
Gluten-free: use a corn or cassava tortilla, and expect a smaller wrap with less fiber.
Nut-free as written. No added sugar in the recipe.
Variations: stir in 1 cup of drained organic black beans to add fiber and plant protein, which gives you enough filling for 2 more burritos. Wilt 5 ounces of spinach into the vegetables for folate and potassium. Stir 1/2 cup of low-sodium salsa into the filling before rolling, drained first so the filling stays dry. A diced jalapeno goes in with the onion and pepper for heat.
Passive time: allow 10 minutes for the filling to cool before rolling, beyond the total time shown.
Storage: wrap each burrito tightly in foil or parchment, then put them all in a labeled freezer bag with the date. They keep 4 days in the refrigerator and 3 months in the freezer.
Reheating from frozen: unwrap the burrito, roll it in a paper towel, and microwave it for 2 to 3 minutes, turning it over halfway. For a crisp outside, finish it in a dry skillet for 2 minutes a side. An overnight thaw in the refrigerator brings the microwave time down to about 90 seconds.
Nutrition is calculated by WP Recipe Maker. Re-run the calculation after import.

Nutrition

Calories: 179kcal | Carbohydrates: 4g | Protein: 15g | Fat: 11g | Saturated Fat: 4g | Sodium: 440mg | Potassium: 232mg | Fiber: 1g | Sugar: 2g | Calcium: 119mg | Iron: 1mg | Magnesium: 19mg | Phosphorus: 181mg | Choline: 9mg

One Sunday Batch Covers Eight Weekday Breakfasts With Protein and Fiber

Eight burritos take about thirty-five minutes on a Sunday and cover eight weekday breakfasts for one person. Each one supplies protein from the eggs and sausage and fiber from the tortilla, so the morning rise in blood sugar stays gradual. Sodium is the trade-off, and the lower-sodium build in the notes brings it down substantially. Eat one with a piece of fruit and the meal is done.

Serve It With

A piece of fruit or a handful of berries alongside adds fiber and rounds the meal out. For a weekend breakfast you cook fresh, Chickpea and Spinach Egg Scramble works the same protein and fiber angle in a skillet.

For a grain-free wrap to use in place of the tortilla, Cottage Cheese Flatbread folds around this identical filling. For more on why the fiber in the tortilla matters, see Fiber 101: Gut Health, Weight Management, Cholesterol, and More.


Cloud Bread, a Low-Carb Gluten-Free Bread You Make From Eggs

Nutrition Snapshot

  • Cloud bread is made from eggs and cottage cheese, so a serving is very low in carbohydrate and fits a blood-sugar-friendly eating pattern.
  • Eggs and cottage cheese are the whole base, so protein comes with every serving.
  • There is no fiber in it and each round is light, so fill two rounds with something substantial to make a meal.

Gluten-free bread is a hard thing to buy. The loaves are heavy, and slice for slice most carry as much carbohydrate as the bread they replace. Cloud bread comes at it from a different direction. You whip egg whites, fold in a smooth base of yolks and cottage cheese, and bake ten soft rounds that hold a sandwich. The whole recipe is eggs, cottage cheese, cream of tartar, and salt.

Whipped Egg White Gives This Bread Its Structure

Ordinary bread holds its shape because gluten, a protein network that forms when wheat flour is mixed and kneaded, traps the gas that yeast makes. Cloud bread uses the same principle with a different protein. Beating egg whites unwinds their proteins, which then link into a mesh around thousands of air bubbles. The oven sets that mesh, and what comes out is a light round with a soft crumb.

The carbohydrate stays very low because there is no flour, and flour is where the carbohydrate in bread comes from. For blood sugar, the carbohydrate is what counts, and gluten has no direct effect on it. A slice of sandwich bread usually delivers 15 to 20 grams of carbohydrate. Cloud bread delivers a small fraction of that, since the small amount comes from the eggs and the cottage cheese.

What’s in a Serving

A serving here is two rounds, enough for one sandwich. Protein comes from the four eggs and the quarter cup of cottage cheese, spread across the batch. The fat comes from the yolks and the cottage cheese, and the amount is modest.

Carbohydrate is very low, and there is no fiber, since the recipe uses no grains, fruits, or vegetables. Sodium is low and comes from the quarter teaspoon of salt and the cottage cheese. The recipe card below has the exact figures.

What to Buy

The Eggs

Use large eggs and separate them cold, since a cold yolk holds together and breaks less easily into the whites. Then let the whites sit on the counter for 15 minutes. Room-temperature whites whip to a greater volume, which gives you taller rounds. Yolk fat cuts the volume the whites reach, so crack each egg into a small bowl first and keep the whites clean.

The Cottage Cheese

Most cloud bread recipes use cream cheese here. Cottage cheese gives the same body with more protein and less fat. Two percent or whole milk cottage cheese works better than nonfat, which is wetter and leaves the rounds damp in the middle. Blend it with the yolks until the mixture is completely smooth, since whole curds show up as lumps in the finished bread.

Cream of Tartar

Cream of tartar is a mild acid sold in the spice aisle. Acid makes whipped egg white more stable, so a quarter teaspoon keeps the foam holding its air through folding and baking. Use half a teaspoon of lemon juice or white vinegar if you have no cream of tartar.

Who This Fits and Who Should Go Easy

Who It Fits

Cloud bread suits anyone eating low-carbohydrate and anyone avoiding wheat. The recipe uses no wheat, barley, or rye, so it works for celiac disease as long as the cottage cheese and cream of tartar are labeled gluten-free. People who find packaged gluten-free bread dense and dry usually like this better.

Go Easy If

Go easy if you expect the bread itself to fill you. These rounds are light, and the filling is what keeps you full. Anyone building a meal around fiber needs to find it elsewhere, and a side of vegetables or a bowl of soup fills that gap. Anyone who adds honey should count it as added sugar.

How to Make It Your Own

The base is plain on purpose, so it works under savory and sweet fillings alike. For a savory round, beat half a teaspoon of garlic powder and a teaspoon of dried Italian herbs into the yolks. A tablespoon of grated Parmesan gives the same flavor and adds more salt. For a sweeter round, a teaspoon of honey or allulose is enough.

Allulose browns and softens much like sugar, so it behaves well in a baked round. Monk fruit is far sweeter than sugar and usually comes in a 1:1 blend, so follow the package to match the sweetness of the sugar you are replacing. Both add sweetness with little or no sugar, and both raise blood glucose less than sugar does.

The Health Swaps in Short

  • Lower sodium: cut the salt to an eighth of a teaspoon and buy a low-sodium cottage cheese.
  • Lower sugar: the base carries no added sugar. If you sweeten it, use allulose or a monk fruit blend in place of honey.
  • Dairy-free: use a dairy-free cream cheese in place of the cottage cheese, and expect flatter, softer rounds. If you also need nut-free, read the label, since many dairy-free cream cheeses are cashew based.
  • Nut-free: the recipe is nut-free as written.

Make It Ahead: The Rounds Firm Up Overnight

Cloud bread is at its best a day after baking. Fresh from the oven the rounds are fragile and slightly damp inside. Cool them completely on a wire rack, then stack them with parchment or wax paper between each one in an airtight container in the refrigerator. By the next morning they are firmer and much easier to handle.

They keep three days refrigerated and up to a month frozen, with paper between the layers so they separate cleanly. Trapped moisture is what softens them, so leave the container open for a few minutes if condensation collects on the lid. Thirty seconds in a dry skillet, or two minutes in a toaster oven, makes the surface firm again.

Print Recipe
No ratings yet

Cloud Bread

Soft, grain-free rounds made from whipped egg whites and a smooth cottage cheese base. Very low in carbohydrate, gluten free, and firm enough to hold a sandwich.
Prep Time15 minutes
Cook Time30 minutes
Total Time45 minutes
Course: Breakfast
Keyword: cloud bread, cottage cheese cloud bread, gluten free bread, grain free sandwich bread, low carb bread
Servings: 5 servings
Calories: 61kcal

Equipment

  • Hand Mixer
  • immersion blender
  • baking sheet
  • Wire Rack

Ingredients

  • 4 eggs large, separated
  • 1/4 cup cottage cheese small curd, 2 percent or whole milk
  • 1/4 teaspoon cream of tartar
  • 1/4 teaspoon salt

Instructions

  • Heat the oven to 300 degrees F.
  • Line two baking sheets with parchment paper.
  • Separate the eggs, putting the whites in a large clean bowl and the yolks in a smaller one.
  • Let the egg whites stand at room temperature for 15 minutes.
  • Add the cottage cheese and salt to the yolks.
  • Blend the yolk mixture until it is completely smooth, using an immersion blender or a small food processor.
  • Add the cream of tartar to the egg whites.
  • Beat the whites on high with a hand mixer until they hold stiff peaks, about 3 minutes.
  • Stir a third of the whites into the yolk mixture to loosen it.
  • Fold the loosened yolk mixture into the remaining whites gently, until the batter is even in color.
  • Scoop the batter onto the lined sheets in ten rounds, about 4 inches across and 1/2 inch thick.
  • Bake for 28 to 32 minutes, until the tops are golden and spring back when pressed.
  • Cool the rounds on the sheets for 5 minutes.
  • Move the rounds to a wire rack and cool them completely.

Notes

Serving size: 2 rounds. The recipe makes 10 rounds, or 5 servings.
Room temperature whites whip to a greater volume, which gives you taller rounds. Yolk fat cuts the volume the whites reach, so crack each egg into a small bowl first and keep the whites clean.
Cottage cheese: most cloud bread recipes use cream cheese here. Cottage cheese gives the same body with more protein and less fat. Use 2 percent or whole milk rather than nonfat, which is wetter and leaves the rounds damp in the middle. Blend it until it is completely smooth, since whole curds show up as lumps in the finished bread.
Cream of tartar: acid makes whipped egg white more stable, so a quarter teaspoon keeps the foam holding its air through folding and baking. Use half a teaspoon of lemon juice or white vinegar if you have no cream of tartar.
Sweeter version: add 1 teaspoon of honey to the yolk base. For a lower sugar option, use 1 teaspoon of allulose or a monk fruit blend in place of the honey. Allulose measures close to sugar and browns much like it. Monk fruit is far sweeter than sugar and usually comes in a 1:1 blend, so follow the package to match the sweetness of the sugar you are replacing.
Savory version: beat 1/2 teaspoon of garlic powder and 1 teaspoon of dried Italian herbs into the yolk base, or add 1 tablespoon of grated Parmesan.
Lower sodium: cut the salt to 1/8 teaspoon and buy a low-sodium cottage cheese.
Dairy-free: use 1/4 cup of a dairy-free cream cheese in place of the cottage cheese, and expect flatter, softer rounds. If you also need nut-free, read the label, since many dairy-free cream cheeses are cashew based.
Nut-free as written. The base carries no added sugar. The recipe uses no wheat, barley, or rye, so it works for celiac disease as long as the cottage cheese and cream of tartar are labeled gluten-free.
Storage: cool the rounds completely, then stack them with parchment or wax paper between each one in an airtight container in the refrigerator. They are firmer and easier to handle on day two. They keep 3 days refrigerated and up to 1 month frozen.
Reviving: 30 seconds in a dry skillet, or 2 minutes in a toaster oven, brings the surface back.
Passive time: allow about 20 minutes for cooling after baking, beyond the total time shown.

Nutrition

Calories: 61kcal | Carbohydrates: 1g | Protein: 6g | Fat: 4g | Saturated Fat: 1g | Sodium: 199mg | Potassium: 84mg | Sugar: 0.4g | Calcium: 29mg | Iron: 1mg | Magnesium: 5mg | Phosphorus: 86mg | Choline: 105mg

Cloud Bread Gives You a Sandwich With Very Little Carbohydrate

Two rounds hold a sandwich together and raise blood glucose very little. The eggs and cottage cheese bring protein along with the bread, where packaged gluten-free bread is mostly starch. There is no fiber and little bulk here, so the filling is what makes it a meal. Build them with chicken salad, tuna, or eggs and a pile of greens.

Serve It With

Fill these rounds with something substantial. Cool ‘n’ Crunchy Chicken Salad is the natural choice, since it brings the protein and the crunch that soft bread lacks. For another grain-free base to rotate with, Cottage Cheese Flatbread blends whole eggs with cottage cheese and bakes flat on a sheet pan. A weekend plate of Chickpea and Spinach Egg Scramble alongside a round brings fiber to the meal.


Chia Seed and Banana Pudding

Nutrition Snapshot

  • Each jar carries about as much fiber as a serving of beans, nearly all of it from the chia.
  • The seeds also bring plant protein, calcium, magnesium, and omega-3 in its plant form.
  • Two ripe bananas put real sugar in each jar, so use one banana if you are watching blood sugar.

Chia seeds thicken milk into pudding without heat, eggs, or starch. Mash two bananas into the milk, stir in the seeds with vanilla and cinnamon, and cover the jars. The seeds take up the liquid while the jars chill. What you spoon out in the morning is thick, cold, and faintly sweet.

Chia Seeds Set the Pudding Because Their Fiber Holds Water

Each chia seed has an outer coat that releases a soluble fiber called mucilage as soon as it meets liquid. The seed swells to several times its dry size and holds the liquid around it in a soft gel. That gel is what turns milk into pudding, with no cooking and no thickener.

Four hours in the refrigerator sets the jars, and a night gives the firmest texture. Ten minutes of hands-on work makes four of them. The gel keeps tightening as it sits, which is why a jar on day three is stiffer than a jar on day one.

Most of Chia’s Fiber Adds Bulk, and the Rest Feeds Your Gut Bacteria

Most of the fiber in chia is the insoluble kind. It passes through unchanged, holds water, and adds the bulk that moves waste through the colon faster. That is the part of a chia habit you notice in a week.

The smaller soluble share is the mucilage that formed the gel. Your colon bacteria ferment it and produce short-chain fatty acids, including butyrate, the preferred fuel for the cells lining the colon wall. Different fibers yield different amounts of butyrate, so eat several fiber sources across a week rather than only chia.

What’s in a Serving

Most of what a jar delivers comes from the seeds. Chia brings plant protein, calcium, magnesium, and omega-3 in its plant form, alpha-linolenic acid. The body converts a small share of that into the forms found in fish, so chia adds to your omega-3 intake rather than replacing seafood.

The milk adds protein and calcium. The banana brings potassium and all of the sweetness. A banana with brown spots tastes sweeter because ripening turns its starch into sugar, and that sugar reaches the blood faster than the starch would have. The card below shows the calculated figures for one jar.

What to Buy

Chia Seeds

Black and white chia are the same seed in two colors, with the same fiber and the same fat. Buy whole seeds for this recipe. Ground chia thickens the milk into a smooth paste instead of the soft beads that make this a pudding. Chia keeps a year or more in a cool, dark cupboard, and the refrigerator or the freezer stretches that once the bag is open.

Swallowing dry chia and then drinking is the one real hazard with these seeds, since dry seeds swell into a plug that can lodge in the esophagus. Anyone who has trouble swallowing should take extra care. Hydrating the seeds in the jar and letting them sit removes the problem.

Bananas

Use bananas that are yellow with a few brown spots. A greener banana mashes into lumps and tastes starchy. A very dark banana is sweeter and softer, and it blends into the milk almost completely.

Milk

Whole milk gives the pudding a richer texture and adds fat. Fat slows how fast the stomach empties, so the sugar from the banana reaches the blood more gradually. Unsweetened almond or soy milk works in the same amount. Read the label for added sugar, since many flavored cartons carry several teaspoons a cup.

Who This Fits and Who Goes Easy

This pudding suits anyone building a gut-friendly eating pattern, and it is an easy way to get a real amount of fiber into breakfast. It works as a make-ahead breakfast, an afternoon snack, or a light dessert. Anyone with a narrowing in the digestive tract, or a history of bowel obstruction, should get clearance from the clinician managing it before adding chia.

If your usual fiber intake is low, start with half a jar and build up over a week or two, drinking more water through the day. A sudden jump in fiber causes gas and cramping for many people. If you have irritable bowel syndrome, the insoluble fiber here is the part that can aggravate symptoms, so start at a quarter jar and hold there for a week.

How to Make It Your Own

A tablespoon of cocoa powder, half a teaspoon of ground ginger, or a spoonful of peanut butter each change the flavor without changing the texture. Berries stirred in after the chill add more fiber. Sliced banana and chopped walnuts on top give the jar some crunch.

The swaps that change the nutrition:

  • Dairy free: use unsweetened almond or soy milk in the same amount. Almond milk lowers the protein in a jar, and soy milk keeps it close to dairy.
  • More protein: whisk a quarter cup of plain Greek yogurt into each jar before it chills.
  • Lower sugar: use one banana in place of two, and add another half teaspoon of vanilla.
  • Nut free and low sodium: the recipe is both as written, so skip the peanut butter and the walnuts if nuts are the issue.

Storage, Make-Ahead, and Serving Ideas

The pudding keeps three to four days covered in the refrigerator. Stir in a tablespoon of milk before serving a jar that has stiffened. Make four jars on Sunday and you have breakfast through Wednesday.

Freezing is a poor option here, since the gel separates and releases water as it thaws. Serve the pudding cold, straight from the jar. It also layers with berries in a glass if you want to put it in front of guests.

Print Recipe
No ratings yet

Chia Seed and Banana Pudding

Chia seeds and mashed banana set into a thick, creamy pudding with no added sugar. Ten minutes of hands-on work makes four make-ahead breakfasts.
Prep Time10 minutes
Total Time10 minutes
Course: Breakfast
Keyword: banana chia pudding, chia pudding, high fiber breakfast, make ahead breakfast, no added sugar pudding
Servings: 4 servings
Calories: 232kcal

Equipment

  • Mixing bowl
  • Whisk
  • Storage Jars

Ingredients

  • 1/2 cup chia seeds
  • 2 cups milk whole
  • 2 bananas ripe, mashed
  • 1 teaspoon vanilla extract
  • 1/4 teaspoon cinnamon ground

Instructions

  • Mash the bananas in a mixing bowl until almost smooth.
  • Pour the milk over the mashed banana.
  • Add the vanilla extract.
  • Add the cinnamon.
  • Whisk until the banana is blended into the milk.
  • Add the chia seeds.
  • Whisk for 30 seconds, until the seeds are suspended through the liquid.
  • Let the mixture stand for 10 minutes.
  • Whisk again to break up any clumps of seeds.
  • Divide the mixture among four jars or bowls.
  • Cover each jar.
  • Refrigerate for at least 4 hours, or overnight.
  • Stir in a tablespoon of milk before serving if the pudding is firmer than you want.

Notes

Serving size is one jar, about 1 cup.
The 10 minute rest before dividing and the 4 hour chill are both passive time and sit outside the total time. Overnight gives the firmest texture.
Swallowing dry chia and then drinking is the one real hazard with these seeds, since dry seeds swell into a plug that can lodge in the esophagus. Hydrate the seeds in the jar and let them sit. Anyone who has trouble swallowing should take extra care.
Buy whole chia seeds for this recipe. Ground chia thickens the milk into a smooth paste instead of the soft beads that make this a pudding. Black and white chia are the same seed with the same fiber and the same fat. Chia keeps a year or more in a cool, dark cupboard, and the refrigerator or the freezer stretches that once the bag is open.
Use bananas that are yellow with a few brown spots. A greener banana mashes into lumps and tastes starchy.
Dairy free: use unsweetened almond or soy milk in the same amount. Almond milk lowers the protein in a jar, and soy milk keeps it close to dairy.
Lower sugar: use one banana in place of two, and add another half teaspoon of vanilla.
More protein: whisk a quarter cup of plain Greek yogurt into each jar before it chills.
Nut free and low sodium: the recipe is both as written, so skip the peanut butter and walnut toppings if nuts are the issue.
Storage: keeps 3 to 4 days covered in the refrigerator, and the gel tightens a little each day. Stir in a tablespoon of milk before serving a jar that has stiffened. Freezing is a poor option, since the gel separates and releases water as it thaws.
If your usual fiber intake is low, start with half a jar and build up over a week or two, drinking more water through the day. If you have irritable bowel syndrome, start at a quarter jar and hold there for a week.

Nutrition

Calories: 232kcal | Carbohydrates: 28g | Protein: 8g | Fat: 11g | Saturated Fat: 3g | Sodium: 50mg | Potassium: 483mg | Fiber: 9g | Sugar: 13g | Calcium: 288mg | Iron: 2mg | Magnesium: 102mg | Phosphorus: 319mg | Choline: 28mg

Chia Turns Milk and Two Bananas Into a Breakfast With Real Fiber

A jar of this pudding gives you a large amount of fiber, most of it the insoluble kind that adds bulk and a smaller share your gut bacteria ferment. It also brings plant protein and the plant form of omega-3. Ten minutes on a Sunday puts four jars in the refrigerator. Keep the portion to one jar, and add fruit on top when you want it sweeter.

Serve It With

A slice of Cinnamon Avocado Quick Bread for a Tender, Butter-Free Loaf next to a jar makes a breakfast with fiber and healthy fat. For another make-ahead snack built on fiber, try Crispy Roasted Chickpeas with Smoked Paprika and Garlic. For more on how soluble and insoluble fiber work, see Fiber 101: Gut Health, Weight Management, Cholesterol, and More.